Monday, December 16, 2019

Mission 3 (Methodology) - Creating the Video/ Post-Production

The video was now ready to be created. We didn't know how long this video would take to create but we got together one more time and started it. The plan was to work on our own part and add them together at the end because that would be the most effective way to do it. I would also help the team with my knowledge in Adobe Premiere.

I created the intro using the text tool in Premiere and would play around with the opacity setting to get it fading in and out. I think the intro turned out great and it would lead to Alek's part where he would talk about the history of fake news. We would use some basic transitions to get to the next part which was mine. I added the main goals at the start of my part and then would go onto talking about what went into creating everything.


From here, I would let Justin talk about how they created the articles and go in depth on that. I would cut in one more time to let everyone know that everything was ready but we just had to wait for replies. Justin would talk about all the fake replies we got and how many views there were on the articles. It would then slowly move into the credits where we had everything referenced.


So we had the video mostly ready but we needed to add our voices to this. Luckily, Alek brought in his microphone which we would use to record our voices. We all recorded our parts but it took awhile because there would be some sort of noise or we would stutter which ruined it.

When we finally got all the audio, we would sit down and listen to it but we realized that half of my part and Alek's part the quality was bad because we moved location a few times to record it. We recorded my parts again but not Alek's because we were running out of time.

We then sat down and added all the audio to the video and lined it up as well. I think it went well and all we needed left was a background track which Alek found and we stuck it into it. I played with the audio and made it louder during the transitions as no one was talking and then lowered it when there was.

Related image
The video was now complete and all we needed now was to export it. We had an issue with this because it wouldn't export in a high quality setting which was annoying. I tried exporting multiple times while changing the settings for the next hour and a half but nothing was working so we left it and uploaded the video to Moodle.

Overall, I was pretty impressed how the video turned out. It was very relaxing to watch because of the song we used and i'm proud of what we did. It took a long time to create this project and I think it was worth it because I learnt a few more skills in Adobe Premiere. One thing I wished we talked more about was the results. I wish we added more of them and talked about Facebook as well but I guess there's nothing I could about it. Otherwise, I think the video turned out very well and I'm glad I got to work with Alex and Justin.

Sunday, December 15, 2019

Mission 3 (Methodology) - Production

For the production, we needed a video to create. We wanted to show our process of how we created everything to promote the fake news site and show the reactions. Alek would talk about the history of  fake news, I would talk about how everything was created and Justin would talk about the results.

We all learned how to use Adobe Premiere and we got to work. For my part, I wanted to create the logo and create the website. Alex set up the email, Facebook and Twitter for us. I wanted to create a logo that would represent an online news site so I used a sans-serif font for the text and pastel colors for the logo. It took me awhile to create the logo and I recorded the whole process from start to finish. It was simple and pleasing to look at and it was everything we needed for this to work.


I started off creating the logo with the font and finding out which would look best. I tried multiple one but one that stuck out was called Avant Garde. I also had a few news logos for reference to get some inspiration from and create a similar style logo. I then experimented with what would look good and I found this V shape that I created look very interesting so I wanted to develop that idea.


I continued developing this idea until I came with up with this.
                            
I would then add the font that I liked and put it below the logo with contrasting weights.


I think the logo turned out really good so we would stick with this and add it to all the sites. Also, I created the website using Wix and it was very simple to do. I used a template that they created and I put the logo on that as well. I recorded myself also creating the website which we would use to put in the video. The website was very simple but effective and here we would put the articles up.


From here, Justin and Alek would create the articles and post them on the site and then promote them. They posted a series of them and the site was looking great. They would also record themselves writing the articles out to be used in the video itself. For Alek's part, he would also film himself looking at research and would use the footage to talk over it.

For Justin's part, we needed to create some reactions as we didn't have enough time to wait for people to respond and we also wanted to prove the point that you shouldn't believe everything, not even us! Justin would create some fake tweets using a site called https://faketweeter.com/ We made it seem believable and not make the posts have tons of likes because realistically, that wouldn't happen. He would also create replies to the posts and make them look believable as well. 

Everything was now ready to be put together in the video and we got to work on that as soon as possible!


Mission 3 (Methodology) - Pre-Production

For my final project, I wanted to push myself harder to accomplish more. I was given a few topics to choose from which all but one sounded uninteresting in my opinion. In the end, I chose digital Journalism to do my project on because it was the most interesting out of them and I knew a bit about it. I knew I could do something with this topic.

Image result for digital journalism
The difference with this project was that it was a video project so we all had to figure out how to make the video. Luckily for me, I had the basic knowledge on how to use Adobe Premiere and it would save me a good bit of time. Before all of this, I would first need to choose a group to create this with.

I able to find two people to do the project with, Justin and Alek. From here, we would brainstorm ideas as to what exactly we wanted to talk about. This topic was very broad and can be done on many things.

Digital Journalism is essentially news online and how it is shown to the public. It can be spread through many methods such as images, blogs, statistics, articles, news sites etc. It can real or fake and the viewer should do their own investigation before believing in stuff which many people don't do.

I was first thinking of showing some news through the different types of methods but Alek had a better idea. We would create some fake news and spread it to mislead people. This was a starting point which we needed to develop but I was excited for it. We thought of many fake news ideas as we could. We thought of using serious topics like murders but that would be too complicated and would maybe get people under fire which is what we didn't want. We refined our ideas and continued on with the project from here.

Image result for fake news

We ultimately wanted to create a series of articles we would be convincing to the public and use interesting headlines to make sure people would click on them. We would use serious topics but would include no names and not make it too specific. We would also use light hearted topics which people could spread easier and not put too much research into it.

From here, we need to decide how to spread the information and make it seem that we were a reliable source. We thought of many ideas but in the end we would create social media accounts on Facebook and Twitter and open up a website to post the articles. The articles would be then posted on the social media sites. We wanted to see what reactions we would get from people and what goes behind that.

Image result for social media

For the sites to look professional, we needed a logo, a simple website, articles and a name of course. We settled for the Vibe News Network and then we got to work on the production side of things.

Mission 2 (Culture) - Results

Image result for oneplus brand
With the project finished, we were able to present it and explain well on everything we learnt. We were asked questions and we answered to the best we could. I liked how our project was unlike everyone else's which set us apart. Also, no one was using the story map to present which also added to it and made it look unique.

The project turned out great overall but there is always room for improvement. I wish we had found more evidence and information on the topic we did. There wasn't enough research on Oneplus as to where they source they materials, how do they treat their workers and how they are shipped. My best guess to where they get the materials is from China itself because they are based there.

What I was able to find which was interesting was that Oneplus is owned by a company called BBK Electronics who also owns it's phone competitor, Oppo. This was interesting to see because not many people know about this. BBK Electronic obviously don't want people to know about this because Oppo and OnePlus are in the same market and have created some sort of fake competition. We found out as well that in India, Oneplus assemble their phones in Oppo factories.

One thing that could of helped us to learn more about the company itself was to actually reach out to it. We did't think of this at the time but this could of helped massively. We would have sent them an email or talk to them through their support chat while asking them a series of questions. This would have been great to see the results of that but knowing how business goes, I don't think they would have said much, in my opinion.

Also, I would have liked to find out more about Oneplus' workers. When we did the research, we only found negative stories about factory workers. It does mean that this doesn't happen but I would have liked to find out the truth on what actually happens. Do they get treated fairly or are they not? That is a question I would like to ask them.

Related image

One more thing, I wish I learnt more about how the disassembly of the phone worked. It was more Fineas doing the work while I watch but I would have liked to help and understand what tools you have to use to take out the parts.

With the presentation, I did like how it was laid out. It was a clear process which went from the finish to the start. It was very simple to understand and was presented well. I enjoyed making this project and i'm glad I worked with Fineas as I learnt a lot from him and I hope he did as well. I know now about the phone process and what it takes for a phone to be made. I also know how rough it can be for people working in this market and hopefully, it's not the case with Oneplus or any company in fact.

Friday, November 15, 2019

Mission 2(Culture) - Production

With the idea we set up, we needed something to display the information. We wanted to tell the story on a map so people could see the distance from where it is now to where it first started. We found a site called StorymapJS which we were able to do just that. We tried to find other sites to show our research but this one worked the best. So we all the things we needed to get the project started.

Fineas and I met up first to first dissect the phone. Fineas was able to dissect it using a kit and looking at YouTube videos for help. I helped with the process. From here, we took pictures of a few main components found in the phone which we would later use to figure out where the materials came from. We put the phone back together after we got everything we needed.

After this, we put all the information that we needed into the story map. We met up again but this time it was to discuss our ideas and talk about finalizing the story map. We figured out how we wanted to put the information together because the story map would act as our presentation slide.

In the story map, we decided to add the location of each step it takes to get back to the materials and put a bit of information on the slides. We didn't want to overload the slides with information as it would be hard to read and wouldn't look pleasing. We added pictures that represented the places as it was pretty difficult to get actual pictures of the locations.

We started the story map off in Ireland which was the end location and moved our way to Poland as this is where OnePlus' warehouses are for Europe. Next was India, which is where Oneplus assemble their phones and ship them to the other OnePlus warehouses. China is where OnePlus are located, more specifically, Shenzhen Guangdong. They manufacture the products here and this is where the materials are stored.

We would then go onto the materials which we had search and wrote about in the last article. We also added some information on the life of a factory worker and how work is in the mines. What we found out was pretty shocking. The life of an average factory and miner is a difficult life as they work many hours and they don't get payed fairly. Foe example, workers are sometimes made to fill out a false time sheet stating that they worked less hours than they did.

Keep in mind that this may not be the case for every factory worker and miner and there is no evidence that OnePlus' don't treat their workers unfairly. It was still very shocked as this is still happening

Overall, I was impressed of how the project turned out and I was surprised on how much of the materials came from China itself. I'm glad I did the project as I learnt more information on phones and how they are built.


The story map is available here.

Mission 2(Culture) - Working for the Web

Image result for phones

For this mission, I decided to choose the topic "Working for the Web". The reason I choose this topic was because I thought it looked interesting and I knew not many people would choose it so it would be unique. I had some sort of idea was the topic was about.

Essentially, there are people that work to create the technology we use to access the web. On the other side, the consumers are also working for the web in a sense that we spend our hours on the web giving the companies our data, which they can use to advertise to us.

I was able to then find a partner interested in the topic as well. Fineas was the partner I chose to team up with and we both signed up on the Slack channel. We also used different ways to communicate instead of using Slack such as WhatsApp.

From this, we decided to figure out what topic we wanted to touch on. We brainstormed and did some research but ultimately we decided that we would dissect a broken phone Fineas had and we would find out where the phone and materials came from. The phone was from a brand named OnePlus and we wanted to find out about the phone. The phone itself would be pretty easy to disassemble as well.

First off, I wanted to do some of my own research on my own. I wanted to find out how to product is made and go through all the steps from where it's sourced up until it gets to the consumers hands. I found out quickly that this would be pretty hard as there is not a lot of information online to find out this topic. I guess many companies don't want this information out for a reason so I had to work with what I was given.

From the research, I had more of an idea of what I wanted to achieve. I wanted to show the process starting from the consumers hands and then the delivery, assembly and manufacturing. We found what components we wanted to go more in depth with which were the battery, the camera lens, the screen and the case.

The battery was a lithium-ion battery and it's made mostly from nickel, cobalt and manganese. The camera lens was made from sapphire crystal and it's also used to create the fingerprint scanner. The case itself is mostly made of metal and manganese. The screen is made from tin and indium. From all this research, I figured out that all the materials that are used in OnePlus phones mostly come from China because they can all be found there. It's also more cost efficient for OnePlus as they don't need to get any materials shipped to them.

Monday, October 14, 2019

Mission 1 (Creativity): Final Update

After I created the GIFs, I sent my team them to ask for their opinions. Once we all agreed on them, we started on the presentation. Justin started with his learnings, Denis then put in his part and then I put in my part with what I did. We put them all on a PowerPoint slide. We met up for one more time to discuss what we are meant to do with our presentations. We all agreed on the timeline. Justin would talk about the pre-production, Denis would talk about the production and I would talk about the post-production!

Overall, I really enjoyed working on this project. I learnt a lot on the history and production of how memes are made. I learnt how to make the memes myself which I liked doing. I understand now that it can take either minutes or hours to create a meme that you're happy with. I also know now that there are many types of ways of making memes through many types of programs such as Photoshop and Gimp.

This project helped me work as a team and be a valuable resource to them. We communicated well and we met up a few times to get the work done together instead of working on our own.

Sunday, October 13, 2019

Mission 1 (Creativity): Production & Post-Production

Once we established everything we needed to do, our team headed out to the city centre to capture the GIFs. Denis brought his camera to capture the footage while Justin and I came up with the GIFs ideas. Our first location was on top of the Arnotts building. I wanted to create a moving 3D GIF and I was the subject for this one. Denis had to take multiple pictures while moving horizontally with the camera. We took multiple shots and then headed to the next location.


Our next location was similar to the last one, with it being on a rooftop as well. This time Denis had to idea to create a funny GIF with the subject jumping off the "roof". Denis was the subject while I recorded the shot. We didn't have much time to create the shot so we headed to our next scene which was along the Liffey. We had the idea to create a cinematic view of the Liffey. I wanted to get a slow moving scene which shows the life of Dublin. We took a few videos of the Liffey and finished up with the shooting.

Post-Production:


The post-production was up to me to do. I had to create the GIFs with the shots we could earlier in the week. Denis edited the photos of the 3D GIF for me but left the footage untouched. The first step for me was to research what tools I would need to use in order to create the GIFs. I had a few software's and apps to choose from such as GIMP and GIF maker on the phone. In the end, I decided to use Photoshop because I'm pretty familiar with the software and wanted more freedom with I was making. 

Before I created the GIFs, I researched how to make GIFs on Photoshop because I didn't know you could make any on it until I started this. I did some research on how to make the 3D effect with the photos we took. Unfortunately, most of the images we took didn't look that great together but we had 3 images I could work with. When putting this GIF together, I had a few problems with how to actually put it together and how to fast to make it. After some trial and error, I created this GIF below.


With the knowledge I took from creating the first GIF, I started on the funny GIF idea. This one was a bit trickier to create because this was a video and the file size was very large. I had to somehow create the GIF while maintaining a low enough file size for it to be exported. I ran through the problem with it not exporting many times. I made several adjustments to the gif such as making the frames faster and shorter. I also decreased the video size so Photoshop would let me export it. Denis' idea was to add the text "FML" underneath the GIF which I added. When it finished exporting, it was still a big file size to brought it to an online GIF compressor. It decreased it a slight bit but I think that was all I could do with it.

Animated GIF


The last one was the cinematic GIF. I went through similar Problems with the previous one. Through the same trial and error, I was able to create a simple GIF of the Liffey. I think it turned out great but it just took awhile to create it due to the file size. 

Animated GIF

Overall, the main thing I learnt was how to create GIFs and the process that goes behind it. You can take several hours or minutes to create a simple GIF. I really enjoyed the process we took creating the GIFs we made. I learnt some more helpful tips on photoshop and problem solved along the way. One thing I wish I did was experiment with turning the video files into GIFs on other softwares and seeing if I could get a similar effect. 

Sunday, October 6, 2019

Mission 1 (Creativity): Pre-Production

There are many options to choose from when choosing the first mission. I decided to go ahead with the "Art of the Animated GIF" mission as it was the most appealing and I had an idea of what to do for it. I also have used Adobe Photoshop so I know that GIFs can be created on it. I'm excited for what I can do with this mission. From that, I joined the Slack channel associated with it.

The next step was to find a like-minded group to start the mission with. Using the Slack channel, you can see who also is interested in the same mission as you. I decided to do it with Justin and Denis and there we formed our group! 

https://slack.com/intl/en-in/downloads/windows

From there, we decided our roles in the group. Justin would research about GIFs, Denis would take the photos created for the GIF and I would create the GIF while experimenting with various types of software and effects.

I decided to do some research on my own using the resources I was given because I wanted a clearer understanding of why the GIF was actually created and why it's still used today. Essentially, It was created in 1987 by Steve Wilhite to send smaller size documents through e-mail as storage back then was a problem. They were only intended to be used for still images but they soon realized that they could create "moving images" through an LZW algorithm. 

The LZW algorithm was however under a patent and the creators of it started charging companies to use it. In protest, many developers started to create their own file sharing file, one of them was PNG. People started using PNGs for still images but no other file could replace GIFs for animated images. These types of animated GIFS were being used to express emotions and feelings.

 Certain styles of GIFs such as Cinemagraph was being used to stop a moment in time and express a somewhat relaxing feeling. This is one of my favorite style of GIFs because it's very minimal and able to tell a story with it. 
Time Beach GIF

Throughout the whole GIFs, by far the most popular are the "memes". They are very easy to understand and have been adopted on the internet on sites such as "Twitter" and "Tumblr". Websites such as Giphy have been created as a way to upload GIFs and share them. The popularity for GIFs have been on the rise ever since and I hope they will used more in an artistic way.

Friday, September 27, 2019

Introduction to a Inspiring Graphic Designer


Hello my name is Edward Vrancianu. I'm currently studying creative digital media in TUDublin and this is my first year doing this. I'm 20 years old and I live nearby so I cycle here every day! I decided to do this course because I have a passion for graphic design and using the Adobe software, mainly Adobe Illustrator and Photoshop.

I started with learning about graphic design online and watching many tutorials to help me with the process. I now like to create logos and abstract posters. I want to further my knowledge on my passion and hopefully get a career in this field!

I'm also hoping to learn, experiment, become more creative and try new things in these many years to come. I'm excited to learn more about photography and the many styles we can take photos.

So far in i've learnt how the camera operates and why all the parts in the camera are used. For example, the lens is used to allow a certain amount of light into the camera for the sensor to transfer it into a photo. The aperture, shutter speed and ISO are also used to help capture the image in the way you want it to. By the end of it, I hope know how to take professional photos for myself because I think it's a good skill for anyone to have.

I've also learnt more about the way we perceive shapes and lines. For example, horizontal lines are used to give a relaxed feeling in the image where as vertical lines can create a feeling of spirituality. I think it's very useful for myself to know these things as I can apply this knowledge in to my logo and poster designs. I also apply my knowledge of using colour and shapes and how they make us feel to create them.

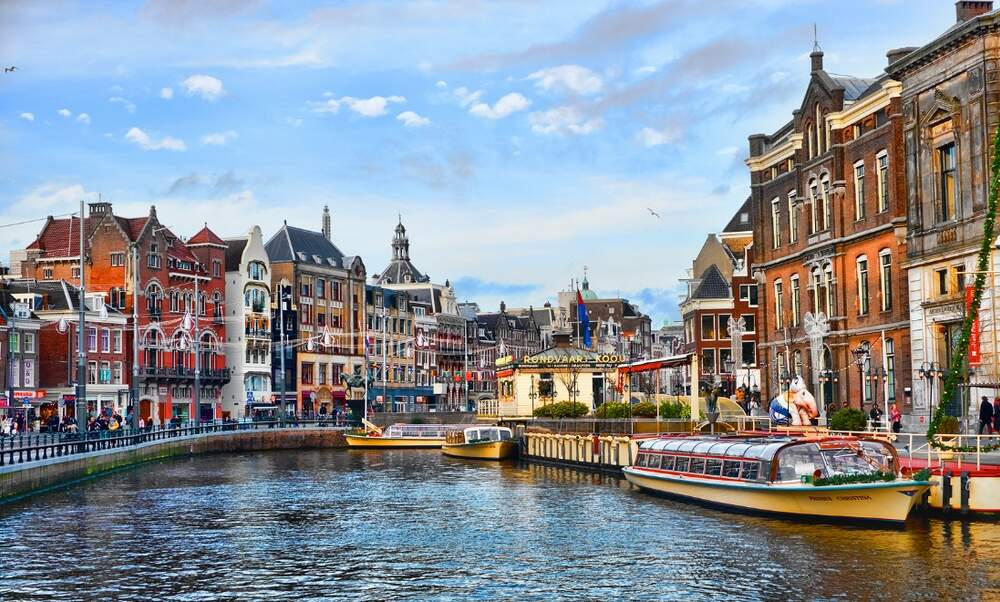
Some more of my hobbies include going to the gym, listening to music and travelling. This year alone i've travelled to Valencia, London, Amsterdam and Albuferia. 

https://www.iamexpat.nl/expat-info/dutch-expat-news/expat-cost-living-ranking-2019-amsterdam-falls-8-places

My favourite place from all them is probably Amsterdam because I went there last year and I have fond memories of the place. I really just enjoy the layout of the city and how everything was so near to each other. I also really enjoyed London. Surprisingly, everyone there was so kind and so diverse. There were all these different cultures in the area we stayed so you wouldn't be able to tell where you were. It was basically a better version of Dublin in my opinion. I miss just tapping onto the trains or buses with my debit card instead of having to top up my Leap Card every day.

Image result for facebook twitter instagram icons